Tuesday, November 26, 2013

November 25, 2013

A Non-Traditional Green Bean Casserole  - Just in time for Thanksgiving!

I like green beans.  They are not my favorite, but I do eat them.  I prefer them fresh, then frozen, and will even eat them canned.  I like cream of mushroom soup.  I don't like a big bowl of it, but as a pantry staple to add to casseroles and other dishes, its just fine.  I LOVE French fried onions.  I could eat the whole can in one sitting, if allowed.  So, why do I not really care for the traditional green bean casserole?  I like all the ingredients in it.  And when served it, I do eat it.  But it's just, in my opinion, kind of blah - a filler on the plate that makes you feel like at least something of your Thanksgiving spread is green and healthy.

One Thanksgiving, my grandmother served a new green bean casserole.  I was skeptical, at first.  The ingredients seemed a little odd:  water chestnuts and bean sprouts?  Is this a Chinese green bean casserole? Hmmm. . . .I was at least intrigued.  Well, imagine my surprise when I first tasted it and loved it!  In fact, for the first time in years I went back for seconds of the green bean casserole.  YUM!  Although,  I really enjoyed it, I did discover over the years of making it on my own, that I missed a few ingredients from the traditional casserole - especially those French fried onions!  So I have tweaked my grandma's recipe a bit (something I rarely do!) to create this green bean casserole that many of my friends and family have requested the recipe for.  It's always completely gone at the end of Thanksgiving dinner and many people get seconds, and thirds and . . . .

Green Bean Casserole

Ingredients:

Two cans of French style green beans (very important that they are french green beans)
One package sliced fresh white mushrooms (you can use canned mushrooms in a pinch)
One small yellow onion, diced
One can sliced water chestnuts, finely chopped
One can bean sprouts
Two cups shredded cheddar cheese
One can French fried onions
Two tablespoons butter
One can cream of mushroom soup


1.  Saute the onions and fresh mushrooms (you can see I was in a pinch and used canned!) until onions are translucent.  

2.  Layer the following items in a greased 9" by 12" pan. One can green beans, half the onion/mushroom saute, half the finely chopped water chestnuts, half the can of bean sprouts, and 1 cup cheddar cheese.


3.  Repeat the layers again, only before topping with cheddar cheese, spread one can cream of mushroom soup over the layers with a spatula.  Top with the last cup of cheddar cheese.


4.  Top with the can of French fried onions.  

5.  Bake for 35-40 minutes in a 350 degrees oven.  Watch the french fried onions.  If they are too brown, cover with foil to continue baking.  


6.  Enjoy!  And be prepared to pass this recipe on!  People will ask for it.  


Saturday, November 2, 2013

Grandma's Birthday Cake, aka "The Cake."

October 9, 2012


When I talked with my cousin recently about making "The Cake," for my daughter's 12th birthday, she seemed perplexed.  She wasn't sure what I was talking about.  Apparently, on her side of the family its called "Mocha Cake."  Whatever it is called, its delicious!  No birthday was complete without it.  I don't know how my kids have survived to this age and they do not remember this cake.  Both have had it numerous times when my grandmother was still living, but I guess they were just too young.   This is one of the few recipes of my grandmother that is not totally from scratch (gasp!)  It starts with a boxed angel food cake (we used Duncan Hines) and is combined with the yummy goodness of a light mocha flavored whipped cream with chocolate mocha icing.  It is not a particularly beautiful cake, but oh it is so tasty!! 

Here are the ingredients you will need: 

One boxed Angel Food Cake
Folgers instant powdered coffee singles (these come in sticks - get the powdered ones, not the crystals)
1/2 stick butter, softened
4-5 Tablespoons brewed coffee, cold
2 Tablespoons Cocoa
2 teaspoons vanilla extract
1 box powdered sugar, plus 3 tablespoons powdered sugar


Step 1:  Make an angel food cake according to the directions on the box.  When cooled, gently slice through the cake to give two equal halves for the cream filling.  It is best to use a bread knife.


Step 2:  Whip one cup heavy whipping cream.  Fold in 3 tablespoons powdered sugar.  Mix in one teaspoon powdered instant coffee.  Place in refrigerator to chill.  


Step 3:   Beat softened butter with two tablespoons cocoa.  Add two teaspoons vanilla and gradually add one box of powdered sugar to make the frosting. 


 Step 4: Take filling out of the refrigerator and spread evenly over both halves of the cake.  Place top half of cake on the bottom half of cake.


Step 5: Now spread the frosting evenly over the cake using a spatula.


Step 6:  Decorate for your favorite birthday girl (or boy, spouse, etc.) and enjoy!!


Note:  This is a great family cake, but may not be enjoyed by all kids, so better to make for your immediate family to enjoy and get the old traditional cake for the kids' party.  It does have a coffee-ish flavor to it, although not strong.  


Sunday, September 15, 2013

Grandma's Cornbread

September 15, 2013


While my children are not huge cornbread fans, I LOVE IT!  But, having said that, I really love my Grandma's cornbread best.  It is not a sweet cornbread, but rather a saltier, buttery tasting cornbread with a spongy texture.  It is dense and not cake like at all.  The most important thing about this recipe is that you MUST make it in a cast iron skillet.  If you do not already have one, do not buy a new one.  You need one that is already seasoned.  Go to  local antique store or flea market.  I remember years ago purchasing mine for the very reason of making this cornbread. 


Here are the ingredients you will need:

1 cup corn meal
1 heaping tbsp all purpose flour
1/2 tsp baking soda
1 tsp baking powder
1 pinch of sugar
1/2 tsp salt
1 cup buttermilk
1 egg
1 tbsp. melted butter


1. Preheat oven to 475 degrees.  Place 1 tbsp. of butter in a 10 inch cast iron skillet and place in oven while it is preheating.
 
 
2.  Place all of the dry ingredients in a bowl.  In a separate bowl, beat the egg with the buttermilk. 
 
 
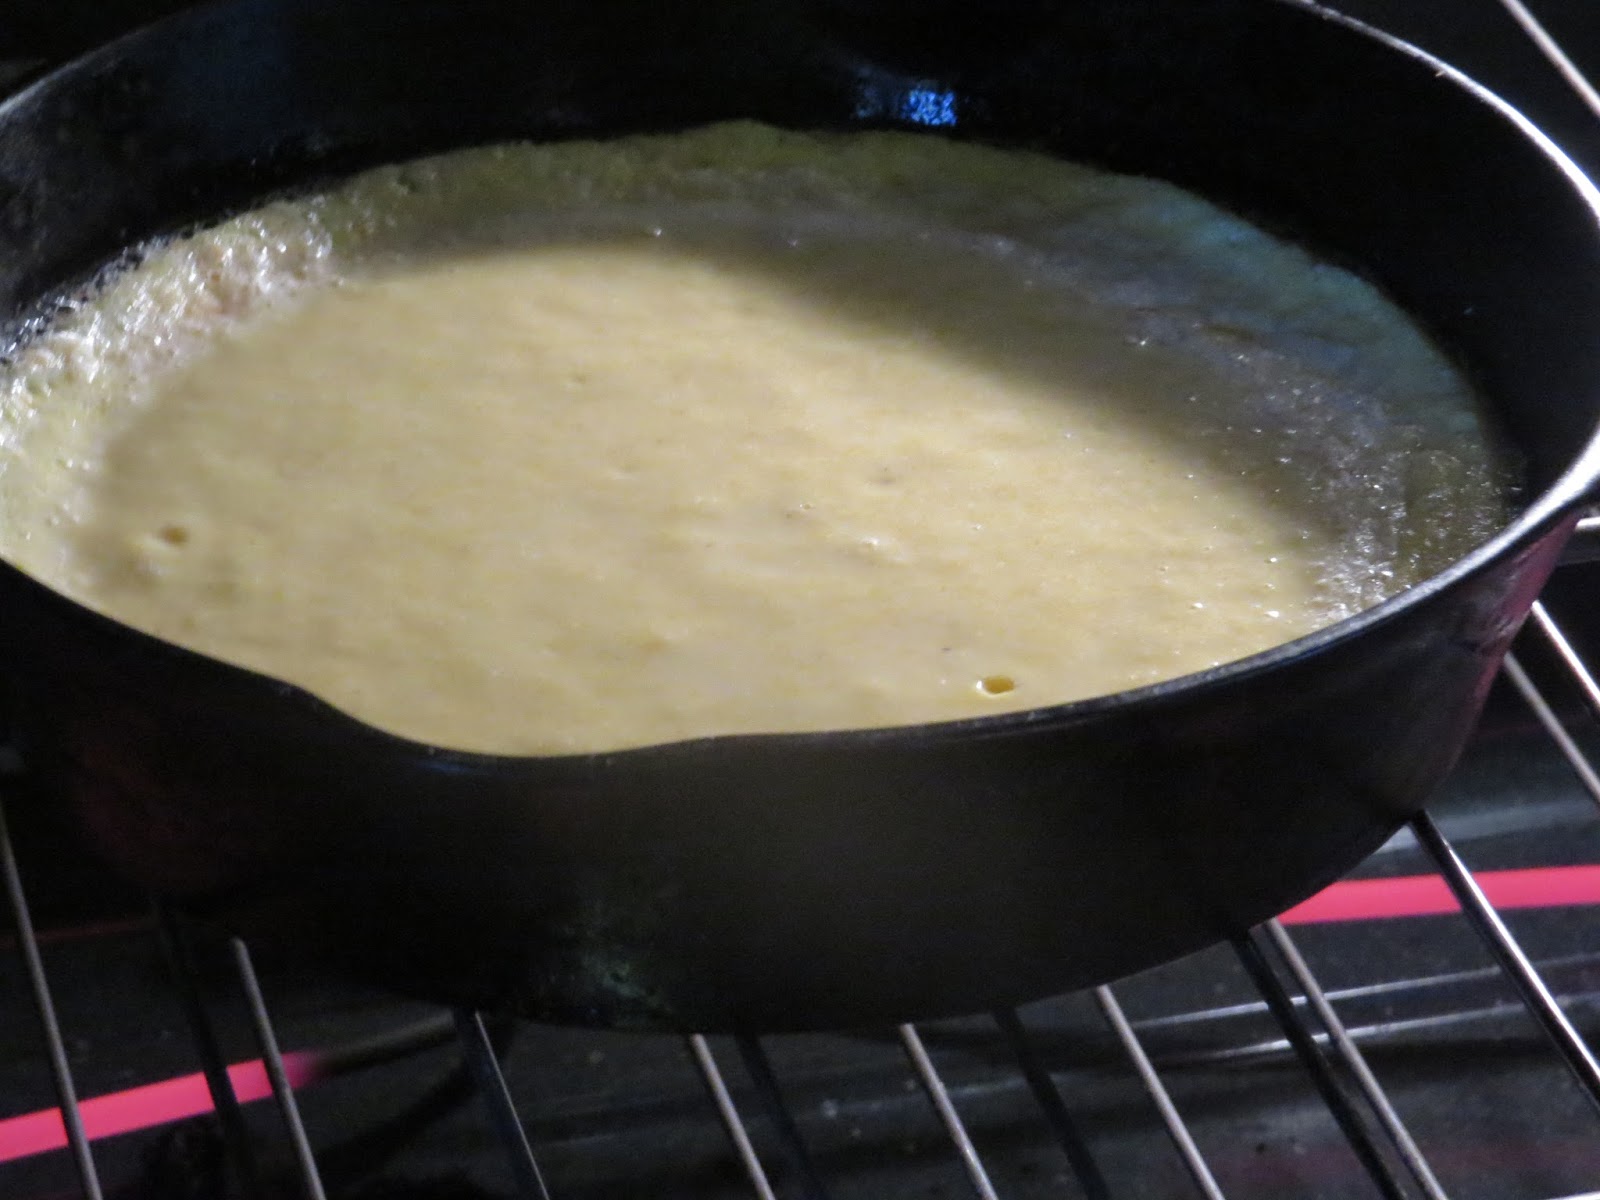
3.  Pour all wet ingredients into the dry ingredients and mix well.  Carefully take cast iron skillet out of the oven and pour the melted butter into the mixture.  Stir well.  Transfer all of  mixture into cast iron skillet and bake for 12-15 minutes.  


I usually pop mine out of the skillet when it is done so that it doesn't continue to cook on the bottom.  Serve immediately with REAL butter.  The butter melts and the sponginess of the cornbread soaks it up so nicely.  This cornbread is really good with a pot of navy beans. 
 
 
One valuable lesson my Grandma taught me too was how to properly clean a cast iron skillet.  I've never googled this to see if this is the preferred method, but it has worked for me all these years.  First, never put any kind of soap on a cast iron skillet.  It will seep into the pores and make your food taste soapy for years to come!!  Rinse the pan well with warm water.  Use steel wool if needed to get out remaining debris.  The next step is super important so that your pan won't rust.  Place your empty pan over medium heat on your stove top.  This will dry out your pan so that it will not rust.  It will take a bit of time for it to completely dry, but don't walk away and forget about it!  (Been there, done that!) 
 
Hope you enjoy this recipe! 
 
The Tripcony Family 

Monday, September 2, 2013

Grandma's Boiled Custard

September 6, 2013


This, by far, is one of my absolute favorite of Grandma's recipes.  It is great for Thanksgiving and Christmas.  Although there are few ingredients, it can be a tricky recipe due to the timing of mixing the various ingredients.   I don't believe I've ever had anybody else's boiled custard besides my Grandma's.  This custard is not as thin as an egg nog, but not quite as thick as a traditional custard.  I have so many fond memories of Grandma teaching me how to make this recipe, but I can honestly say that as an adult, I don't believe I've ever made this on my own.  Well this time was no exception.  I had to ask my mom to dig up the recipe and when she gave it to me, it was clear that I would need some help!  Here is what my Grandma's recipe looks like: 

Here is what the recipe says:  Heat one quart rich milk into a double broiler.  When boiling add well beaten yolks of three eggs diluted with 1/2 cup cold milk and 1 tbsp. flour.  Beat whites to a stiff froth.  Add a pinch of salt.  When well beaten add 1C sugar and beat till smooth.  Then add slowly to heated milk and cook till thickens.  Flavor when chilled.  Huh?  So, I called in my mom and my sister Julie to help interpret.

We gathered together one afternoon this  past week for lunch and cooking.  All of us studied that recipe card at length and began debating the various ways we remembered Grandma making boiled custard.  It was quite an experience and an experiment!  I am happy to say that the custard turned out great!  Several things can go wrong when making this dessert.  You can mix the cold egg mixtures too quickly with the other ingredients and cause them to cook, leaving bits of cooked egg in your custard.  You can also not heat the mixture enough for the yolks to set, causing it to have too thin a consistency.  With  a little help from my family, this turned out almost as good as Grandma's!! 

Here are the ingredients you will need to make boiled custard:  

* 1qt., plus 1/2 cup whole milk
* 3 large eggs, separated into yolks and egg whites
* 1 tbsp. all purpose flour
* 3/4 cup sugar (Grandma's recipe calls for 1 cup, but my mom said she always used less.)
* a pinch of salt

For topping (ingredients to make homemade whipped cream, nutmeg is optional)
* whole nutmeg
* heavy whipping cream
* powdered sugar
                                                        minus the powdered sugar


1.  Separate the egg yolk and whites from three eggs.  Set aside to get to room temperature.


2. Begin heating 1 qt. milk in double boiler over medium low heat.  While milk is heating, place 1 tbsp. flour in a bowl.  Slowly whisk 1/2 cup cold milk into flour.  Beat well the yolks of the three eggs and add it to the flour mixture.


3.  While milk is heating, paying careful attention that it hasn't boiled yet and stirring occasionally, beat egg whites of three eggs to a stiff froth.  Add a pinch of salt and continue to beat a few more minutes.  Then slowly beat in one cup sugar and set aside. 


4.  Here comes the hard part!  When milk is at a low boil,  you will need to stir the egg mixture into the hot milk very carefully.  Take a small amount of the heated milk and stir it constantly into the egg mixture to warm it up a bit first.  Then, take a portion of this egg mixture and pour it back into the pan with the milk while constantly stirring.  The idea is to slowly mix parts of each mixture back and forth between each, gradually adding more each time and constantly stirring, so that at no time, does the heat from the milk shock the egg mixture, causing the yolks to cook. Also, don't let the milk go to a strong boil at all during this time. Reduce heat if you need to.  Hope that makes sense!!!  Sorry no pictures of this one!  This step was too hard to photograph. 

5.  When you have completed step four, do the same back and forth process to stir the egg white mixture into the pan.  Cook at low boil stirring constantly until mixture easily and thickly coats the spoon.  Take off heat and transfer to different bowl and place into refrigerator to cool approximately 24 hrs.


6.   To serve custard, you should make homemade whipped cream!  None of that canned stuff!!  Beat heavy whipping cream with a dash of real vanilla extract until slightly thick.  Add powdered sugar to taste and continue beating until desired consistency.  We don't like ours very sweet.   Once cooled, put your custard into pretty mugs, ramekins or other individual serving dishes.  Top with a spoonful of whipped cream and finally add nutmeg to the top.  We use whole nutmeg that we grate with the fine setting on a cheese grater.  My grandmother actually had a small nutmeg grater, but I had to improvise.  Do yourself a favor and buy the whole nutmeg instead of  powdered nutmeg - its not as good. 


We really enjoyed making this together as a family!  We enjoyed making the custard and our boys enjoyed eating it!!  My husband Shane says, "This custard is awesome!  I am a huge egg nog fan, but this is much better than egg nog!"  My son Garret says, "I really love egg nog and this is even better!"


(Pictured:  From L to R - Julie, Mom and Shelby)
 
 
Hope you enjoy!! 
 
The Tripcony Family 


Sunday, August 25, 2013

Grandma's Yeast Rolls

August 25, 2013


We finally got a chance this past week to make Grandma's Yeast Rolls.  I am informed by my mother that they really go back to her mother, Jessie Driver.  If Grandma Jessie were alive, I bet that she would tell us that they had been passed down to her as well.  I love that about family recipes!  

If you have ever had Grandma's yeast rolls, two things are noteworthy.  First, they were always hot.  Second, they kind of melt in your mouth.  The texture is amazing!  While Shelby and I had great fun making these, I must say, they were not like Grandma's!  I forgot about the part where she used to put them in the oven a little before we would sit down for dinner.  The recipe makes two pans of rolls, so she would pop the second pan in after she took out the first.  This way your first AND second (and for many third and fourth) rolls were always hot.  The butter would ooze out of it as you took your first bite.  By the time I got everyone to the table, my rolls were a little bit cold and the butter definitely was not oozing out!  They were still tasty, but just not quite the same. 

The texture of our rolls just wasn't quite right either.  When I told my mother this, she said that Grandma used to always swear that her rolls weren't as good as her mother's either.  She was certain that Grandma Jessie must have left out a "secret ingredient" just to confuse her!  The texture of our rolls was definitely good, just not quite like Grandma's.

I remember the first time I made Grandma's rolls.  I was working at Arkansas Children's Hospital and I called her for the recipe.  This was easily 15 years ago.  I jotted it down in my very poor handwriting on some scraps of paper.  It is barely legible. (This may be why they didn't turn out quite right!  Ha!)  I have saved this in my recipe drawer all these years, even though I haven't made them again since then.


Here are the ingredients you will need for the yeast rolls: 


*2 cups milk (I used 2%)                                          
*1/2 cup sugar, plus 1/2 teaspoon sugar
*1 1/2 sticks butter
*1 envelope plain yeast (not rapid rise)
*6 cups all purpose flour
*1/4 cup water to dissolve yeast
*1 large egg
*1 teaspoon salt


Here is a picture of some of the ingredients:


1. Heat 2 cups milk until lukewarm - hot enough to dissolve 1 stick butter and 1/2 cup sugar, but not boiling.  Once dissolved, pull the pan off the burner to cool contents.  For rapid cooling, place the pan in ice water.


The apron Shelby is wearing is one that either me or my sister, Lauren, made in Home Economics in junior high school as a present for my Grandma.


2. In a cup, dissolve yeast and 1/2 teaspoon sugar in 1/4 cup tepid water (100-110 degrees F).  Set it aside to rest for 10 minutes. 
 
3. Pour cooled milk mixture and yeast into mixing bowl.  Gradually beat 4 cups flour into batter and beat until smooth.  Let rise at room temperature for an hour. 


4. Beat an egg and add a teaspoon of salt.  Pour into dough mixture with the additional 2 cups flour.  Knead until dough is elastic.  Place dough in a greased bowl and flip the dough over to coat both sides.  Cover and put in the ice box.  (Yes, my recipe said "ice box," not refrigerator, because I was quoting my sweet grandma!)  I think I remember that this dough can be stored for several days, but we let it sit overnight before we made it into rolls the next day.  
 
5. When ready to roll out your dough, rub flour on your rolling surface.  Divide dough into smaller sections and roll 1 at a time to make it easier. 


6.  Use a round cookie cutter (we used the edge of a glass cup about 3 inches diameter) to cut out circles.  These will form your rolls.  Melt last half stick of butter to rub on the front and back of the circles of dough.  Fold them into semicircles and place neatly in a round glass pie pan.  (We only had one round pie pan, so we used a smaller casserole dish for the second batch.)


7.  Once made into rolls, place in warm, dark place to rise for at least 2 hours.  My grandma would put them in a bathroom cabinet!!
 
 
8.  Place oven rack in middle of oven.  Preheat oven to 375 degrees.  Bake 20-25 minutes or until tops are light brown.  


Here is the finished product, minus the roll I ate.  The ones in the front are a little browner than they should be.  You want yours to look more like the one's in the back left. 
 
Reviews by the Tripcony men (a.k.a Shane and Garrett):
 
"These versatile rolls are great for breakfast, lunch or dinner.  They are excellent for a snack or dessert.  I like my best for breakfast with scrambled eggs and cheese stuffed inside." - Shane Tripcony
 
"These rolls are delicious, puffy, and good.  I like mine best with spaghetti." - Garrett Tripcony
 
I hope you will enjoy making these with your own family.  Would love to know how they turned out, or if you have any questions about the steps. 
 
 
Enjoy!
 
The Tripcony Family

Friday, August 23, 2013

A tribute to my Grandma

August 22, 2013


This is my first time to ever blog, so bear with me!! I have no clue how to customize any of this and feel good just to have gotten the picture of my grandmother and me up on the cover!   I am beginning this blog as a tribute to my grandmother, Donna Rae Schmelzer who died August 16, 2010.  She was a FABULOUS cook!  So much of her life centered around her home, hospitality and most importantly her kitchen.  She served up more than just meals in her kitchen; she served up love, graciousness and a warmth that I will never forget.   She taught me almost everything I know about cooking and these are some of the most cherished memories I have from my childhood.  In her kitchen was a drawer full of recipes - some written on recipe cards, others written on scraps of paper here and there, some from the newspaper or a magazine.  Since her death, I have been meaning to write at least some of her best recipes down for our family and friends who knew her to enjoy.  It's taken me this long to do it. 

So this blog is for you, Grandma!  Shelby, Garrett, Shane and I will be involved in making a new recipe every week.  Shelby and I will mainly be doing the cooking and Garret and Shane will be doing the sampling!  I am so excited to share these recipes with my family and friends.  I look forward to creating new memories with my children by honoring you in this special way.  I am not nearly the hostess or cook that you were, so I will only be concentrating on one food item a week:  a main dish, a dessert, a side dish, etc.  Coming soon . . . Grandma's Yeast Rolls!